在Monaco Editor中实现断点设置的方法详解
目录
Monaco Editor 是 vscode 等产品使用的代码编辑器,功能强大(且复杂),由微软维护。编辑器没有原生提供设置断点的功能,本文在 React + TypeScript(Vite)框架下使用 @monaco-editor/react 并介绍开发断点显示时踩到的坑。最终展示 鼠标悬浮显示断点按钮,点击后进行断点的设置或移除。
本文不涉及调试功能的具体实现,可阅读 DAP 文档
最终实现可直接拉到文末。
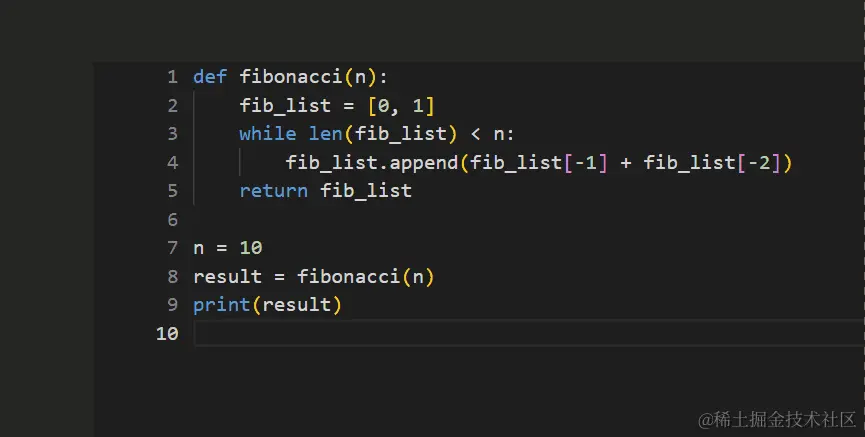
搭建 Playground
React + TypeScript,使用的封装为 @monaco-editor/react。
建立项目并配置依赖:
yarn create vite monaco-breakpoint
...
yarn add @monaco-editor/react
依赖处理完成后,我们编写简单的代码将编辑器展示到页面中:(App.tsx)
import Editor from '@monaco-editor/react'
import './App.css'

function App() {
  return (
    <>
      <div style={{ width: '600px', height: '450px' }}>
        <Editor theme='vs-dark' defaultValue='// some comment...' />
      </div>
    </>
  )
}
export default App
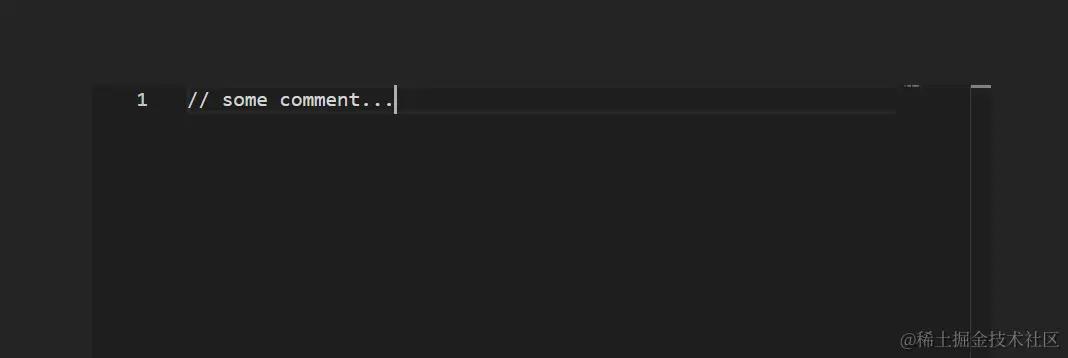
接下来在该编辑器的基础上添加设置断点的能力。
一种暴力的办法:手动编写断点组件
不想阅读 Monaco 文档,最自然而然的想法就是手动在编辑器的左侧手搭断点组件并显示在编辑器旁边。
首先手动设置如下选项
- 编辑器高度为完全展开(通过设置行高并指定 height 属性)
- 禁用代码折叠选项
- 为编辑器外部容器添加滚动属性
- 禁用小地图
- 禁用内部滚动条的消费滚动
- 禁用超出滚动
编辑器代码将变为:
const [code, setCode] = useState('')

...

<div style={{ width: '600px', height: '450px', overflow: 'auto' }}>
<Editor
  height={code.split('\n').length * 20}
  onChange={(value) => setCode(value!)}
  theme='vs-dark'
  value=[code]
  language='python'
  options={{
	lineHeight: 20,
	scrollBeyondLastLine: false,
	scrollBeyondLastColumn: 0,
	minimap: { enabled: false },
	scrollbar: { alwaysConsumeMouseWheel: false },
	fold: false,
  }}
/>
</div>
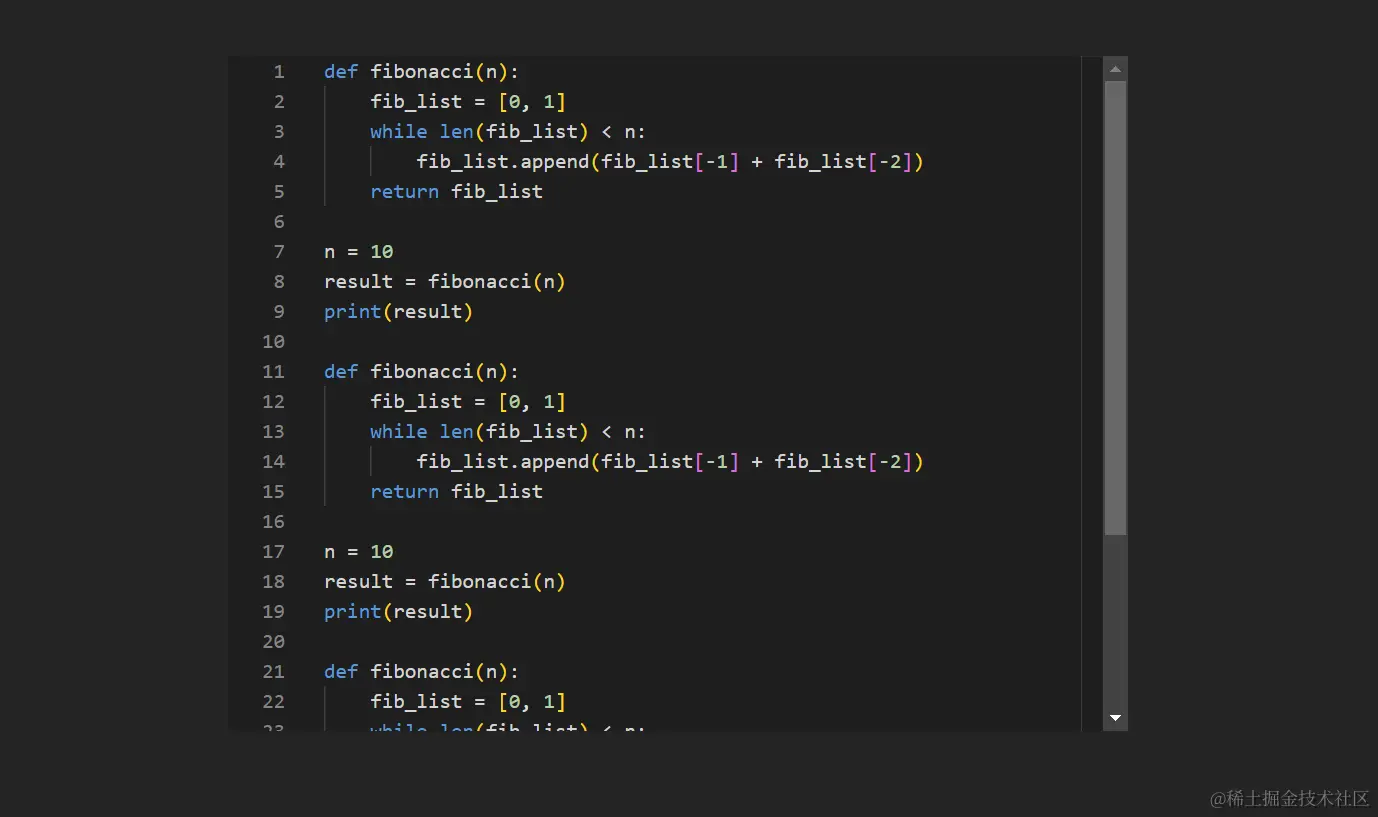
现在编辑器的滚动由父容器的滚动条接管,再来编写展示断点的组件。我们希望断点组件展示在编辑器的左侧。 先设置父容器水平布局:
display: 'flex', flexDirection: 'row'
编写断点组件(示例):
  <div style={{ width: '600px', height: '450px', overflow: 'auto', display: 'flex', flexDirection: 'row' }}>
	<div
	  style={{
		width: '20px',
		height: code.split('\n').length * 20,
		background: 'black',
		display: 'flex',
		flexDirection: 'column',
	  }}
>
	  {[...Array(code.split('\n').length)].map((_, index) => (
		<div style={{ width: '20px', height: '20px', background: 'red', borderRadius: '50%' }} key={index} />
	  ))}
	</div>
	<Editor ...
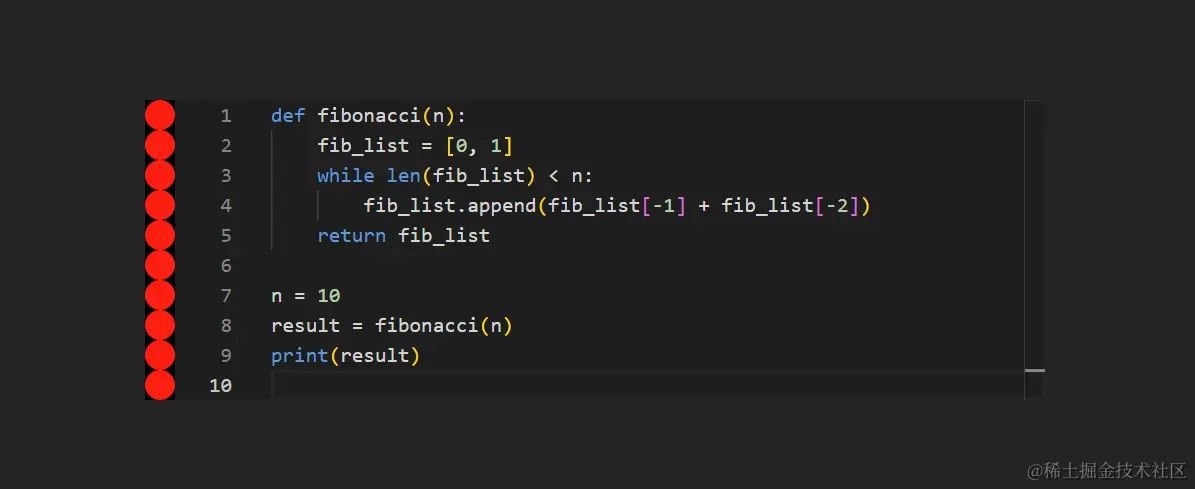
目前断点组件是能够展示了,但本文不在此方案下进行进一步的开发。这个方案的问题:
- 强行设置组件高度能够展示所有代码,把 Monaco 的性能优化整个吃掉了。这样的编辑器展示代码行数超过一定量后页面会变的非常卡,性能问题严重。
- 小地图、超行滚动、代码块折叠等能力需要禁用,限制大。
本来目标是少读点 Monaco 的超长文档,结果实际上动了那么多编辑器的配置,最终也还是没逃脱翻文档的结局。果然还是要使用更聪明的办法做断点展示。
使用 Decoration
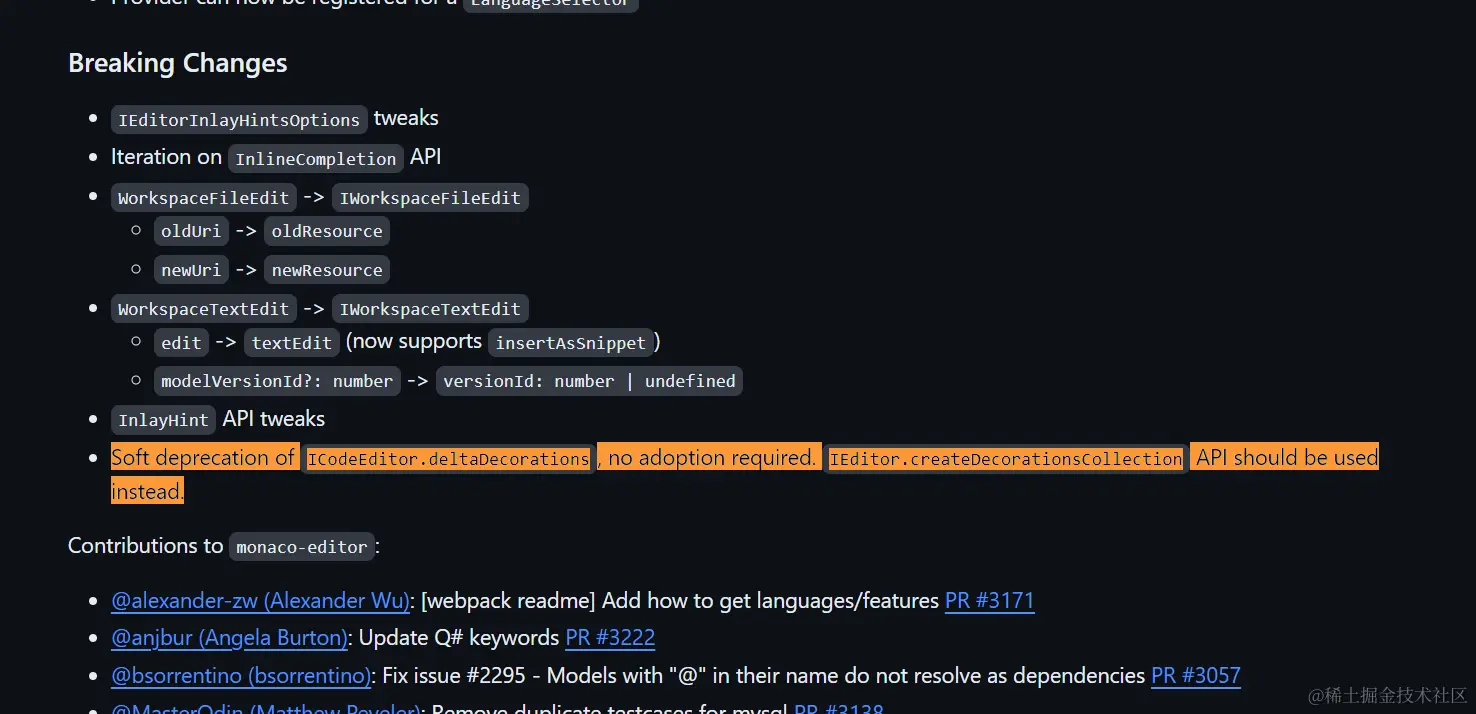
在 Monaco Editor Playground 中有使用行装饰器的例子,一些博文也提到了可以使用 DeltaDecoration 为编辑器添加行装饰器。不过跟着写实现的时候出现了一些诡异的问题,于是查到 Monaco 的 changelog 表示该方法已被弃用,应当使用 createDecorationsCollection。 这个 API 的文档在 这里。
为了能使用 editor 的方法,我们先拿到编辑器的实例(本文使用的封装库需要这么操作。如果你直接使用了原始的 js 库或者其他封装,应当可以用其他的方式拿到实例)。 安装 monaco-editor js 库:
yarn add monaco-editor
将 Playground 代码修改如下:
import Editor from '@monaco-editor/react'
import * as Monaco from 'monaco-editor/esm/vs/editor/editor.api'
import './App.css'
import { useState } from 'react'

function App() {
  const [code, setCode] = useState('')

  function handleEditorDidMount(editor: Monaco.editor.IStandaloneCodeEditor) {
	// 在这里就拿到了 editor 实例,可以存到 ref 里后面继续用
  }
  return (
    <>
      <div style={{ width: '600px', height: '450px' }}>
        <Editor
		    onChange={(value) => setCode(value!)}
		    theme='vs-dark'
	        value=[code]
	        language='python'
	        onMount={handleEditorDidMount}
        />
      </div>
    </>
  )
}

export default App
Monaco Editor 的装饰器是怎样设置的?
方法 createDecorationsCollection 的参数由 IModelDeltaDecoration 指定。其含有两个参数,分别为 IModelDecorationOptions 和 IRange。Options 参数指定了装饰器的样式等配置信息,Range 指定了装饰器的显示范围(由第几行到第几行等等)。
// 为从第四行到第四行的范围(即仅第四行)添加样式名为breakpoints的行装饰器

const collections: Monaco.editor.IModelDeltaDecoration[] = []
collections.push({
	range: new Monaco.Range(4, 1, 4, 1),
	options: {
		isWholeLine: true,
		linesDecorationsClassName: 'breakpoints',
		linesDecorationsTooltip: '点击添加断点',
	},
})

const bpc = editor.createDecorationsCollection(collections)
该方法的返回实例提供了一系列方法,用于添加、清除、更新、查询该装饰器集合状态。详见 IEditorDecorationsCollection。
维护单个装饰器组:样式表
我们先写一些 css:
.breakpoints {
  width: 10px !important;
  height: 10px !important;
  left: 5px !important;
  top: 5px;
  border-radius: 50%;
  display: inline-block;
  cursor: pointer;
}

.breakpoints:hover {
  background-color: rgba(255, 0, 0, 0.5);
}

.breakpoints-active {
  background-color: red;
}
添加装饰器。我们先添加一个 1 到 9999 行的范围来查看效果(省事)。当然更好的办法是监听行号变动。
const collections: Monaco.editor.IModelDeltaDecoration[] = []
collections.push({
	range: new Monaco.Range(1, 1, 9999, 1),
	options: {
		isWholeLine: true,
		linesDecorationsClassName: 'breakpoints',
		linesDecorationsTooltip: '点击添加断点',
	},
})

const bpc = editor.createDecorationsCollection(collections)
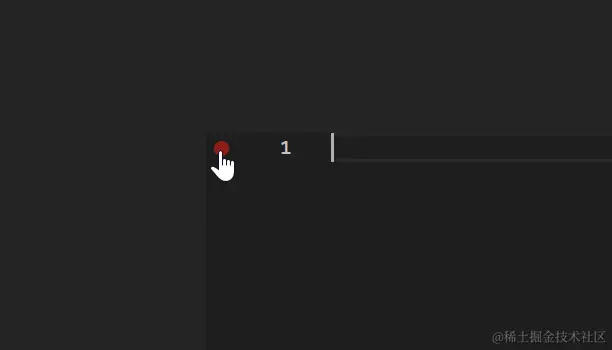
装饰器有了,监听断点组件的点击事件。使用 Monaco 的 onMouseDown Listener。
editor.onMouseDown((e) => {
  if (e.event.target.classList.contains('breakpoints'))
	e.event.target.classList.add('breakpoints-active')
})
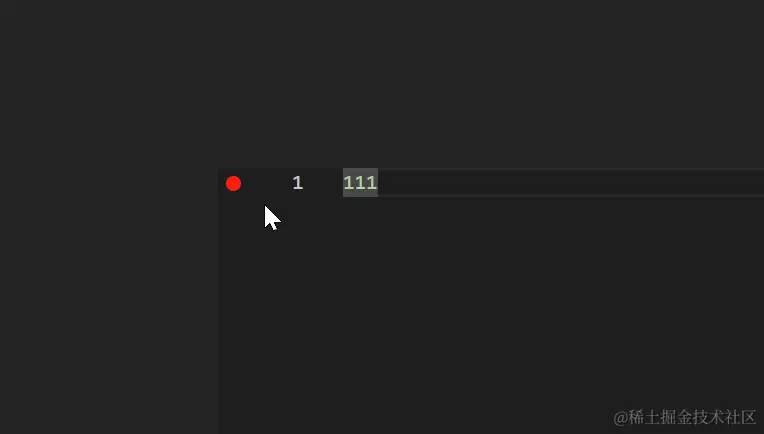
看起来似乎没有问题?Monaco 的行是动态生成的,这意味着设置的 css 样式并不能持久显示。
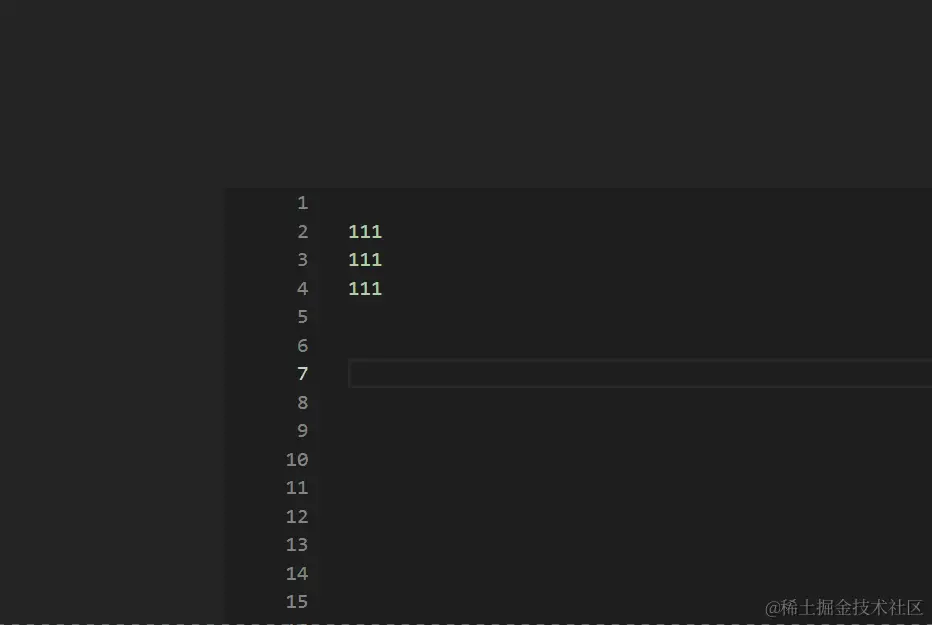
看来还得另想办法。
维护单个装饰器组:手动维护 Range 列表
通过维护 Ranges 列表可以解决上述问题。 不过我们显然能注意到一个问题:我们希望设置的断点是行绑定的。
假设我们手动维护所有设置了断点的行数,显示断点时若有行号变动,断点将保留在原先的行号所在行。监听前后行号变动非常复杂,显然不利于实现。有没有什么办法能够直接利用 Monaco 的机制?
维护两个装饰器组
我们维护两个装饰器组。一个用于展示未设置断点时供点击的按钮(①),另一个用来展示设置后的断点(②)。行号更新后,自动为所有行设置装饰器①,用户点击①时,获取实时行号并设置②。断点的移除和获取均通过装饰器组②实现。
- 点击①时,调用装饰器组②在当前行设置展示已设置断点。
- 点击②时,装饰器组②直接移除当前行已设置的断点,露出装饰器①。
如需获取设置的断点情况,可直接调用装饰器组②的 getRanges 方法。
多个装饰器组在编辑器里是怎样渲染的?
两个装饰器都会出现在编辑器中,和行号在同一个父布局下。

顺便折腾下怎么拿到当前行号:设置的装饰器和展示行号的组件在同一父布局下且为相邻元素,暂且先用一个笨办法拿到。
// onMouseDown事件下
const lineNum = parseInt(e.event.target.nextElementSibling?.innerHTML as string)
实现
回到 Playground:
import Editor from '@monaco-editor/react'
import * as Monaco from 'monaco-editor/esm/vs/editor/editor.api'
import './App.css'
import { useState } from 'react'

function App() {
  const [code, setCode] = useState('')

  function handleEditorDidMount(editor: Monaco.editor.IStandaloneCodeEditor) {
	// 在这里就拿到了 editor 实例,可以存到 ref 里后面继续用
  }
  return (
    <>
      <div style={{ width: '600px', height: '450px' }}>
        <Editor
		    onChange={(value) => setCode(value!)}
		    theme='vs-dark'
	        value=[code]
	        language='python'
	        onMount={handleEditorDidMount}
	        options={{ glyphMargin: true }} // 加一行设置Monaco展示边距,避免遮盖行号
        />
      </div>
    </>
  )
}

export default App
断点装饰器样式:
.breakpoints {
    width: 10px !important;
    height: 10px !important;
    left: 5px !important;
    top: 5px;
    border-radius: 50%;
    display: inline-block;
    cursor: pointer;
}

.breakpoints:hover {
    background-color: rgba(255, 0, 0, 0.5);
}

.breakpoints-active {
    width: 10px !important;
    height: 10px !important;
    left: 5px !important;
    top: 5px;
    background-color: red;
    border-radius: 50%;
    display: inline-block;
    cursor: pointer;
    z-index: 5;
}
整理下代码:
  const bpOption = {
    isWholeLine: true,
    linesDecorationsClassName: 'breakpoints',
    linesDecorationsTooltip: '点击添加断点',
  }

  const activeBpOption = {
    isWholeLine: true,
    linesDecorationsClassName: 'breakpoints-active',
    linesDecorationsTooltip: '点击移除断点',
  }

  function handleEditorDidMount(editor: Monaco.editor.IStandaloneCodeEditor) {
    const activeCollections: Monaco.editor.IModelDeltaDecoration[] = []
    const collections: Monaco.editor.IModelDeltaDecoration[] = [
      {
        range: new Monaco.Range(1, 1, 9999, 1),
        options: bpOption,
      },
    ]

    const bpc = editor.createDecorationsCollection(collections)
    const activeBpc = editor.createDecorationsCollection(activeCollections)

    editor.onMouseDown((e) => {
      // 加断点
      if (e.event.target.classList.contains('breakpoints')) {
        const lineNum = parseInt(e.event.target.nextElementSibling?.innerHTML as string)
        const acc: Monaco.editor.IModelDeltaDecoration[] = []
        activeBpc
          .getRanges()
          .filter((item, index) => activeBpc.getRanges().indexOf(item) === index) // 去重
          .forEach((erange) => {
            acc.push({
              range: erange,
              options: activeBpOption,
            })
          })
        acc.push({
          range: new Monaco.Range(lineNum, 1, lineNum, 1),
          options: activeBpOption,
        })
        activeBpc.set(acc)
      }

      // 删断点
      if (e.event.target.classList.contains('breakpoints-active')) {
        const lineNum = parseInt(e.event.target.nextElementSibling?.innerHTML as string)
        const acc: Monaco.editor.IModelDeltaDecoration[] = []
        activeBpc
          .getRanges()
          .filter((item, index) => activeBpc.getRanges().indexOf(item) === index)
          .forEach((erange) => {
            if (erange.startLineNumber !== lineNum)
              acc.push({
                range: erange,
                options: activeBpOption,
              })
          })
        activeBpc.set(acc)
      }
    })

    // 内容变动时更新装饰器①
    editor.onDidChangeModelContent(() => {
      bpc.set(collections)
    })
  }
看起来基本没有什么问题了。
注意到空行换行时的内部处理策略是跟随断点,可以在内容变动时进一步清洗。
    editor.onDidChangeModelContent(() => {
      bpc.set(collections)
      const acc: Monaco.editor.IModelDeltaDecoration[] = []
      activeBpc
        .getRanges()
        .filter((item, index) => activeBpc.getRanges().indexOf(item) === index)
        .forEach((erange) => {
          acc.push({
            range: new Monaco.Range(erange.startLineNumber, 1, erange.startLineNumber, 1), // here
            options: {
              isWholeLine: true,
              linesDecorationsClassName: 'breakpoints-active',
              linesDecorationsTooltip: '点击移除断点',
            },
          })
        })
      activeBpc.set(acc)
      props.onBpChange(activeBpc.getRanges())
    })
完整实现
App.tsx:
import Editor from '@monaco-editor/react'
import * as Monaco from 'monaco-editor/esm/vs/editor/editor.api'
import './App.css'
import { useState } from 'react'
import './editor-style.css'

function App() {
  const [code, setCode] = useState('# some code here...')

  const bpOption = {
    isWholeLine: true,
    linesDecorationsClassName: 'breakpoints',
    linesDecorationsTooltip: '点击添加断点',
  }

  const activeBpOption = {
    isWholeLine: true,
    linesDecorationsClassName: 'breakpoints-active',
    linesDecorationsTooltip: '点击移除断点',
  }

  function handleEditorDidMount(editor: Monaco.editor.IStandaloneCodeEditor) {
    const activeCollections: Monaco.editor.IModelDeltaDecoration[] = []
    const collections: Monaco.editor.IModelDeltaDecoration[] = [
      {
        range: new Monaco.Range(1, 1, 9999, 1),
        options: bpOption,
      },
    ]

    const bpc = editor.createDecorationsCollection(collections)
    const activeBpc = editor.createDecorationsCollection(activeCollections)

    editor.onMouseDown((e) => {
      // 加断点
      if (e.event.target.classList.contains('breakpoints')) {
        const lineNum = parseInt(e.event.target.nextElementSibling?.innerHTML as string)
        const acc: Monaco.editor.IModelDeltaDecoration[] = []
        activeBpc
          .getRanges()
          .filter((item, index) => activeBpc.getRanges().indexOf(item) === index) // 去重
          .forEach((erange) => {
            acc.push({
              range: erange,
              options: activeBpOption,
            })
          })
        acc.push({
          range: new Monaco.Range(lineNum, 1, lineNum, 1),
          options: activeBpOption,
        })
        activeBpc.set(acc)
      }
      // 删断点
      if (e.event.target.classList.contains('breakpoints-active')) {
        const lineNum = parseInt(e.event.target.nextElementSibling?.innerHTML as string)
        const acc: Monaco.editor.IModelDeltaDecoration[] = []
        activeBpc
          .getRanges()
          .filter((item, index) => activeBpc.getRanges().indexOf(item) === index)
          .forEach((erange) => {
            if (erange.startLineNumber !== lineNum)
              acc.push({
                range: erange,
                options: activeBpOption,
              })
          })
        activeBpc.set(acc)
      }
    })

    // 内容变动时更新装饰器①
    editor.onDidChangeModelContent(() => {
      bpc.set(collections)
    })
  }
  return (
    <>
      <div style={{ width: '600px', height: '450px' }}>
        <Editor
          onChange={(value) => {
            setCode(value!)
          }}
          theme='vs-dark'
          value=[code]
          language='python'
          onMount={handleEditorDidMount}
          options={{ glyphMargin: true, folding: false }}
        />
      </div>
    </>
  )
}

export default App
editor-style.css:
.breakpoints {
  width: 10px !important;
  height: 10px !important;
  left: 5px !important;
  top: 5px;
  border-radius: 50%;
  display: inline-block;
  cursor: pointer;
}

.breakpoints:hover {
  background-color: rgba(255, 0, 0, 0.5);
}

.breakpoints-active {
  width: 10px !important;
  height: 10px !important;
  left: 5px !important;
  top: 5px;
  background-color: red;
  border-radius: 50%;
  display: inline-block;
  cursor: pointer;
  z-index: 5;
}
以上就是在Monaco Editor中实现断点设置的方法详解的详细内容,更多关于Monaco Editor断点设置的资料请关注代码部落其它相关文章!
本文章来源于网络,作者是:云末花开,由代码部落进行采编,如涉及侵权请联系删除!转载请注明出处:https://daimabuluo.cc/JavaScript/2253.html

